Installing A Window Air Conditioner
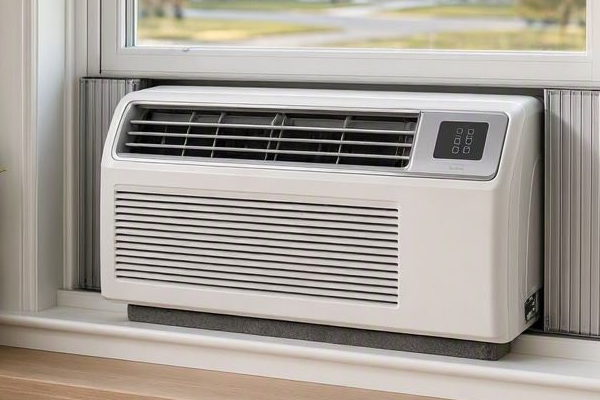
Properly installing a window air conditioner saves energy and keeps the cool air from escaping your home while keeping warm air from entering. It also prevents water damage by allowing the condensation water to drain properly.
The steps we will outline in this guide will cover picking the right air conditioner for your window, preparing the opening, mounting, sealing and testing the installation. Some of the steps will vary depending on the manufacturer and model. Always refer to the owner’s manual for exact installation requirements.
How to pick the right window air conditioner?
Match the A/C Unit to the square footage of the room you will be cooling using the manufacturer’s room size chart. Also take into consideration the size of the window opening.
To measure the square footage of the room you multiply the width of the room by the length. For example a 10 foot wide room multiplied by the length of 20 feet equals 200 square feet.
The GE Appliance Guide recommends a 6000 BTU air conditioner for this size room if you were to purchase one of their units. Other manufacturers may suggest a different size. Certified Energy Star models can save you as much as 35% on energy costs. Visit Energystar.gov for their window air conditioner sizing guide.
BTU Calculator For Air Conditioners
Choosing the correct size air conditioner for your room square footage is important. Too large of a unit will result in cooling the room too quickly while not removing enough moisture and too small of a unit will result in the air conditioner constantly running to try and cool the air in the room.

Measuring the window opening for the air conditioner
Window width
Measure the width of the inside opening between the left and right window tracks on double hung windows. On sliding windows open the window all the way. Measure the distance from the inner frame edge to the inner side of the open sliding sash (locking side). This will let you know if the air conditioned accordion panels will fit.
Window height
To measure the height you start from the bottom window sill up to the edge of the raised sash on double hung windows. On sliding windows measure from the bottom window sill to the edge of the top frame.
Sill Depth
Measure from the front of the window sill to the back. This is to make sure the air conditioner has a solid stable surface to rest on.
If you have security bars on your windows, shutters, or awnings that can interfere with your window air conditioner you should adjust the size of the A/C accordingly or modify these items. Check the sill for any weakness as it must be able to hold the weight of the air conditioner.
Electrical power access and requirements
Your new air conditioner will require a power outlet within 6-7 feet of the install. Most window a/c units come with a 6 to 7.5 foot power cord check the model you are purchasing for exact size of the power cord.
Read the label on the A/C unit and manual to determine voltage and plug type required. Outlet must be properly grounded. Never use extension cords or power strips with a window air conditioner.
Check local building codes, homeowner association and property manager for any restrictions before purchasing and installing an air conditioner especially if installing above the first floor. If you are unsure of electrical requirements or need help always call on a professional for assistance.
When do you need a air conditioner support bracket?
Most small window air conditioners don’t need an extra support bracket unless the sill it will be resting on is weak or damaged. Others that are over 80lbs or over 5000 BTU should receive the extra support.
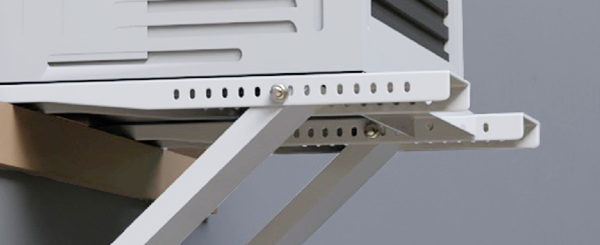
Building codes in your area or landlords may require support brackets and for general safety it is a good idea to install extra support.
There are several different types of support brackets available. Before purchasing a support bracket check your A/C owners manual for any recommendations and you can contact the manufacturer for advice on your model.
Tools and safety
Screwdriver
Level
Drill & bits
Tape measure
Mounting bracket
Included hardware
If the A/C unit is heavy or awkward to handle alone get someone to help you. Wear gloves and eye protection when installing and drilling any holes. If installing on the floors above the first floor make sure to keep the area under your install blocked off from any foot traffic using caution tape or barriers.
Steps for Installing the window air conditioner
Inspect the sill
Inspect the sill for any damage, rot, cracking or weakness and repair before installing the air conditioner. Check stability and level. Locate where the condensation line will drain. The line should not drain onto walkways, walls or any other electrical equipment.
Placing the air conditioner on the sill
During this step have someone help you lift and stabilize the unit on the sill with controls facing you. The manual should give instructions on if the unit sits level or has a slight tilt for drainage.
Once stable on the sill and in the correct position install the supplied brackets using the included hardware. Follow the instructions in the manuals and Building codes. Do not install on a weak unstable surface. If installing additional supports follow the manufacturer’s guidelines.
Extend and Secure the Side Panels
Following the instructions in the owners manual for a double hung window extend and secure the side panels to the window frame with the included hardware. If installing to a sliding window follow these instructions
Lower the sash onto the air conditioner or the channel provided and secure as instructed. Test the sash to make sure it doesn’t rise or shift when the A/C is running.
Seal around the air conditioner to prevent air from escaping
Using the weather seals provided with the unit seal the space between the A/C and upper/lower sashes. Seal the space between the side panels. If needed you can also use spray expanding foam.
Sealing prevents cold air from escaping and warm air from entering through cracks and gaps.
Inspect the A/C unit
Check the unit install again before putting it into service. Make sure nothing is blocking the intake or the exhaust area. Check the condensation line routing and that the drain is not blocked. Plug the air conditioner in and perform a run test.
Test the controls, fan speeds and operation of the remote if it has one. Inspect and feel for any air loss from the seals and that the unit is cooling properly
Follow the instructions that came with your air conditioner for regular maintenance and cleaning.
By CW Mathews