Repairing A Cracked Fiberglass Bathtub Floor
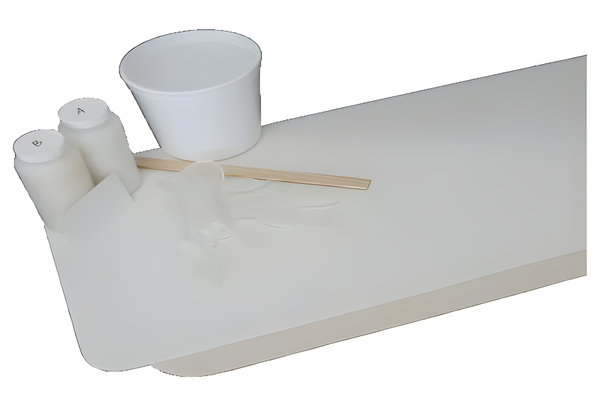
Do you have a cracked fiberglass bathtub floor and think the only solution is to replace it? Well think again, repairing a cracked fiberglass bathtub floor can be done in less then an hour using a fiberglass bathtub repair inlay kit.
Fiberglass bathtub repair inlay kits are a permanent repair for cracked damaged fiberglass, acrylic and cultured marble bathtub floors.

What is a fiberglass inlay and how do they work?
All fiberglass repair products are not alike. There are bathtub floor repair inlays that are made from plastic and glued to the floor of a bathtub with silicone. These cheap temporary patches are a waste of money.
The only repair inlay we recommend is offered by US Bath Products. It is made from durable semi-ridged composite and fused to the bathtub floor using a 2 part adhesive for a lifetime repair of your cracked fiberglass bathtub floor.
These inlays measure 16″ x 36″, are flexible and will never crack. Designed to look like a bathtub mat the fiberglass inlay will repair small to large cracks including holes in the floor of your bathtub. They can be used on fiberglass, acrylic and cultured marble bathtub floors and support up to 250 lbs.

Supporting a weak fiberglass bathtub floor
Installation takes about an hour for a bathtub that doesn’t require extra support under the repair area. If the bathtub floor is spongy or has a lot of flex when you step into it then extra support is needed.
To support a weak cracked bathtub floor the crack must first be stopped from further cracking. This is accomplished by drilling a 1/4 inch hole at each end of the crack .
Once the cracking is mitigated the repair area needs to receive extra support by injecting triple expanding foam under the bathtub and just under the damaged area of the floor. Triple expanding foam can be purchased at your local hardware store and comes in spray cans. A typical repair requires one can of expanding foam.
The expanding foam is injected through the holes that were drilled on the ends of the crack and allowed to expand under the repair area until the foam starts to come out of the crack then stop injecting the foam.
Allow the foam to dry and cure for 24 hours. Once cured cut or scrape the foam away flush with the bathtub floor then proceed with the inlay install.
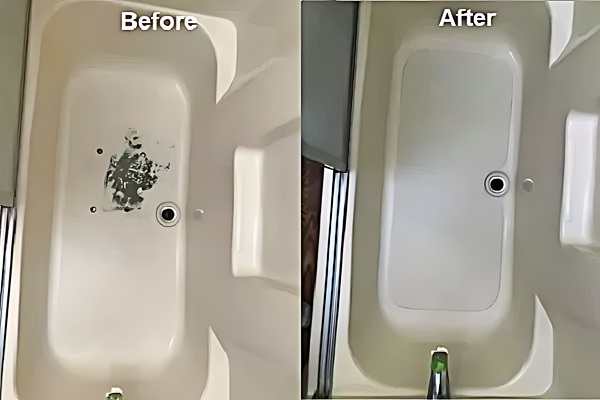
Installing the fiberglass bathtub floor repair inlay
The fiberglass bathtub crack repair inlay kit will come with a plastic pail for mixing the 2 part glue compound, an application spreader for applying the compound once mixed and gloves. Additional supplies you will need include:
Acetone
1-1/2 inch masking tape
Paper Towels
100 grit sandpaper
When your fiberglass bathtub repair inlay arrives, lay the inlay on a flat surface and weight it down with a couple of books and let it acclimate to room temperature for 24 hours.
Once the inlay has acclimated temporarily place the inlay on the floor of the bathtub covering the damaged area and positioned where you want the inlay to be permanently place. Note the inlay must be placed on the flat part of the bathtub and not curl up the wall of the bathtub.
Weight the inlay down using a couple of books then outline the shape of the inlay using the masking tape. Once outlined remove the inlay. Using the 100 grit sandpaper rough sand the barhtub floor inside the area of the tape where the inlay will go. Rough sand until the area is matte with no gloss sheen.
When using chemicals and glue ventilate the area by opening windows or by using a fan.
Vacuum up the dust caused by sanding. Then using a paper towel dampened with Acetone wipe the floor area inside the tape removing any sanding film and contaminants from the surface. Allow Acetone to dry completely.
In the plastic pail provided thoroughly mix all of contents of bottle A and bottle B together making sure you scrap the sides of the pail as you mix. Using the spreader provided apply an even layer of the glue compound you just mixed to the bathtub floor area inside the taped outline where the inlay is to be placed.
With the smooth side of the fiberglass bathtub repair inlay facing down towards the bottom of the bathtub, place the inlay onto the bathtub floor inside the taped outline and press into the glue compound.
Using a roller or a smooth sponge and starting in the middle of the inlay press firmly on the inlay while pushing the roller or sponge out towards the tape outline. Continue doing this all around the inlay pushing the bubbles out of the glue compound.
Excess glue compound will push out onto the tape. When done carefully remove the tape and discard in the trash. You can wipe up any excess glue that got onto the bathtub with Acetone.
Allow the inlay and leftover glue compound in the pail to dry for 24 hours before using bathtub or discarding leftover material in the trash. To maintain your new fiberglass bathtub repair inlay wash it weekly with mild soap and water.
By Peter Carr